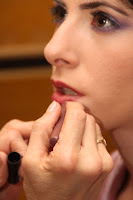
You already know how to choose shades that are right for you. Now what can you do with lipstick colors you love, but you can no longer twist up to tube to get at the color, but you see plenty of color in the tube? What do you do with lipsticks that have melted or lost their 'point' or their shape and can no longer be used without leaving you with two lips of color that remind you of how you used to apply your mother's lipstick when you were four?
Don't throw away your lipsticks!
If your lipstick is basically full, but kind of melted out of shape, you can carefully re-shape it and then put it in the fridge or freezer until it hardens a bit. This way you may be able to get a 'little' more use out of the lipstick, but you are not going to throw your lipsticks in the fridge/freezer every day.
The best method is to
1) IMMEDIATELY remove all lipsticks, glosses and lip treatments you no longer use from your makeup bag, box, drawer or makeup table. Take them out of 'circulation' – they are just taking up space and making you crazy.
2) Take a good look at each lipstick and the amount left in each tube. The ones you will keep are the shades you love and you look good in and have enough lipstick to be useful. THROW OUT EVERYTHING ELSE – NOW!
3) Look at your selection. Choose the one you like best. You may find that they are all the same shade or very close to each other. If you have say, reds and pinks – put them in two separate piles, for now.
4) Take a very small glass container – I love using the small eye cream containers or pots. I wash and disinfect them (boiling water, soap and alcohol) and dry them thoroughly. You can also buy very small glass containers in any cheap cosmetic chain store.
5) Scoop the lip color from the lipsticks you've selected using either a wooden manicure stick or - I like to save and then use - the small plastic curved applicators that come with eye cream. Place the lip color into the glass container you prepared in advance (above) and then use the same stick or applicator to mash and "stir" the color around a bit. This stirring action with create a bit of warmth which will help the color become smoother and more pliable.
6) The amount of color you create is a function of the amount of left-over lipsticks you have and the amount of space you have in your container. It's all up to you.
7) Before adding additional colors or shades, check the color on your lips.
8) You only need to add a second (or more) lip color if you wish to create a lighter or darker shade or wish to give your shade a different hue (red with a brownish hue, pink with a reddish hue and so on).
9) Add only a small amount of a second (or more shade) at a time, blend very well and then try on your lips. Work slowly!
10) To finish off the lip color, add a small amount of gel lip gloss to the mix to create an even smoother lip treatment. The amount of gloss you use depends on your own personal preference. Here too, add only a small amount of gloss at a time, blend very well and then try on your lips.
11) I personally find that many lip glosses are sticky or gluey, so this is a great way to add some gloss without the unpleasantness of the treatment.
12) You can also use the lip gloss as a filler to create more volume without adding extra color (that you may not have). I like to add a lip gloss that is slightly colored and scented to add that 'little something extra'.
Have fun with your lip colors! You invested in them and it's time you got the most out of them!

